
How Experts Remove Imperfections from Your Car’s Surface
- bromchild84
- Sep 29, 2025
- 4 min read

When it comes to maintaining the flawless look of your car, removing surface imperfections is key. Over time, your vehicle’s paintwork can develop scratches, swirl marks, oxidation, and other blemishes that dull its appearance. Experts use a specialized technique to restore the paint’s original shine and smoothness. This technique is known as the paint correction process. In this article, we will explore how professionals expertly remove imperfections from your car’s surface, the tools and products they use, and what you can expect from the process.
Understanding Surface Imperfections on Cars
Before diving into the correction methods, it’s important to understand the types of imperfections that can affect your car’s paint. These flaws can be caused by environmental factors, improper washing techniques, or everyday wear and tear.
Swirl Marks: These are tiny scratches caused by abrasive cleaning or drying with dirty cloths.
Scratches: Deeper than swirl marks, scratches can be caused by keys, branches, or accidents.
Oxidation: Exposure to sunlight and air causes the paint to fade and lose its gloss.
Water Spots: Mineral deposits left behind after water evaporates can etch into the paint.
Etching and Contaminants: Bird droppings, tree sap, and road tar can damage the surface if not removed promptly.
Experts carefully assess these imperfections to determine the best approach for correction.

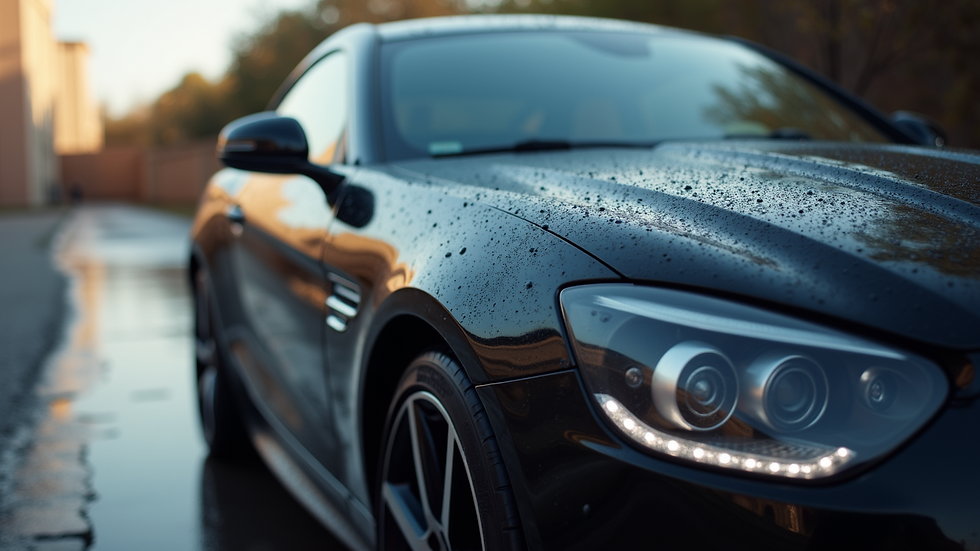
Close-up view of swirl marks on a car’s paint surface
How the Paint Correction Process Restores Your Car’s Finish
The paint correction process is a multi-step procedure designed to remove or reduce imperfections and restore the paint’s clarity and gloss. It involves the use of polishing compounds, machines, and expert techniques to carefully remove a microscopic layer of the clear coat.
Step 1: Thorough Cleaning and Decontamination
Before any correction work begins, the car is washed meticulously to remove dirt and grime. This is followed by a clay bar treatment to eliminate embedded contaminants that washing alone cannot remove.
Step 2: Machine Polishing
Using rotary or dual-action polishers, experts apply polishing compounds that gently abrade the clear coat. This step removes surface defects like swirl marks and light scratches. The choice of pad and polish depends on the severity of the imperfections.
Step 3: Refining the Surface
After the initial polishing, a finer polish is used to refine the paint surface, enhancing gloss and removing any haze left behind.
Step 4: Protection
Once the paint is corrected, a protective layer such as wax, sealant, or ceramic coating is applied to preserve the finish and make future cleaning easier.
This process requires skill and experience to avoid damaging the paint further. Professionals tailor each step to the condition of the vehicle.

Eye-level view of a professional polishing a car’s hood
What is Stage 1 Paint Correction Process?
Stage 1 paint correction is the initial level of correction aimed at removing minor imperfections without aggressive polishing. It is ideal for vehicles with light swirl marks, minor scratches, and slight oxidation.
Purpose: To restore gloss and clarity with minimal paint removal.
Tools Used: Dual-action polishers with light cutting compounds.
Time Required: Usually a few hours depending on the vehicle size.
Outcome: A noticeable improvement in paint clarity and shine without the risk of over-polishing.
Stage 1 correction is often recommended for newer cars or those that have been regularly maintained but need a refresh.

High angle view of a car’s glossy finish after stage 1 paint correction
Tools and Products Experts Use for Paint Correction
Professional paint correction relies on high-quality tools and products to achieve the best results safely.
Polishing Machines: Dual-action and rotary polishers provide controlled abrasion.
Polishing Pads: Foam or microfiber pads of varying abrasiveness are selected based on the task.
Compounds and Polishes: Cutting compounds remove defects, while finishing polishes enhance gloss.
Clay Bars: Remove surface contaminants before polishing.
Protective Coatings: Waxes, sealants, and ceramic coatings protect the corrected paint.
Experts also use inspection lights to identify imperfections and monitor progress during the process.
Tips for Maintaining Your Car’s Surface After Correction
Once your car has undergone the paint correction process, maintaining its flawless finish is essential to prolong the results.
Wash Regularly: Use pH-balanced car shampoos and soft microfiber mitts.
Avoid Automatic Car Washes: These can cause new scratches and swirl marks.
Dry Carefully: Use clean, soft towels or air dryers to prevent water spots.
Apply Protective Coatings: Reapply wax or sealant every few months.
Park in Shade: Protect your car from UV damage and environmental contaminants.
Address Contaminants Quickly: Remove bird droppings, sap, and tar as soon as possible.
Following these tips will help keep your car looking showroom fresh for longer.
Why Professional Paint Correction is Worth It
While DIY kits are available, professional paint correction offers several advantages:
Expertise: Professionals understand paint types and defect severity.
Proper Tools: Access to industrial-grade polishers and products.
Safety: Minimizes risk of paint damage or uneven results.
Time-Saving: Efficient process completed in a few hours.
Long-Lasting Results: Enhanced protection and finish longevity.
Investing in professional correction not only improves your car’s appearance but can also increase its resale value.
By understanding how experts remove imperfections from your car’s surface, you can appreciate the skill and care involved in restoring your vehicle’s beauty. Whether you choose a simple Stage 1 correction or a more advanced treatment, the paint correction process is a proven way to bring back that showroom shine and protect your investment for years to come.


Comments