
Restoring Your Car’s Finish with Car Paint Correction Solutions
- bromchild84
- Dec 22, 2025
- 4 min read

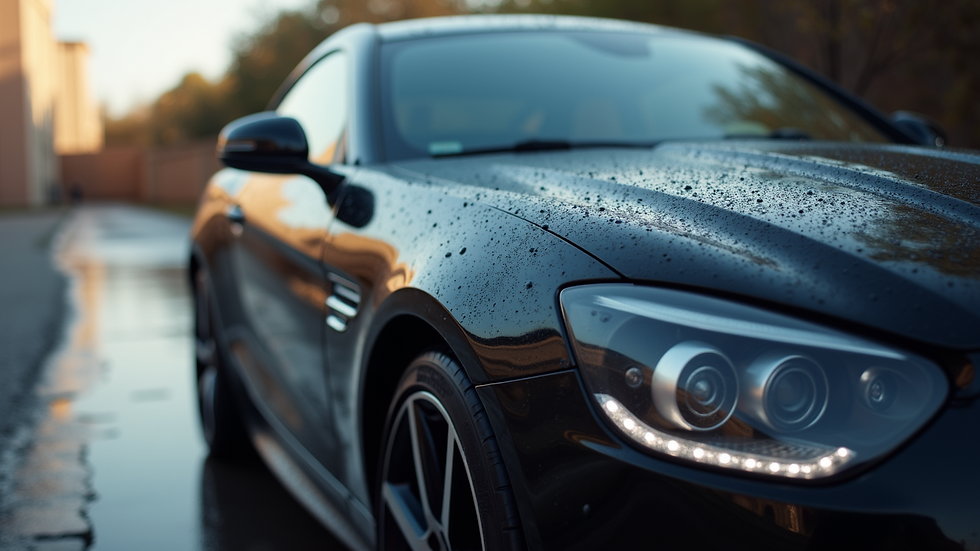
When your car’s paint starts to lose its shine or shows signs of scratches and swirl marks, it can be disheartening. Fortunately, car paint correction solutions offer a way to restore your vehicle’s finish to its original glory. This process involves carefully removing imperfections from the paint surface, leaving a smooth, glossy, and vibrant finish. Whether you’re a car enthusiast or just want to maintain your vehicle’s value, understanding paint correction can help you make informed decisions.
Understanding Car Paint Correction Solutions
Car paint correction is a multi-step process designed to remove surface defects such as swirl marks, scratches, oxidation, and water spots. These imperfections often result from everyday wear and tear, improper washing techniques, or environmental factors like UV exposure and acid rain.
The process typically involves:
Washing and decontamination: Thoroughly cleaning the car to remove dirt, tar, and other contaminants.
Claying: Using a clay bar to remove bonded contaminants that washing alone cannot eliminate.
Polishing: Using abrasive compounds and polishing pads to remove a thin layer of clear coat, eliminating imperfections.
Finishing polish: Refining the surface to enhance gloss and clarity.
Sealing or waxing: Protecting the corrected paint with a sealant or wax to maintain the finish.
Professional detailers use specialized machines and products to achieve the best results. However, some car owners choose to perform paint correction themselves using DIY kits, though this requires patience and practice.
Benefits of Paint Correction
Restores shine and depth: Removes dullness and brings back the original colour vibrancy.
Increases resale value: A well-maintained finish can boost your car’s market appeal.
Protects paint: Removing contaminants and sealing the paint helps prevent future damage.
Improves appearance: Makes your car look newer and well cared for.
Choosing the Right Car Paint Correction Solutions
Selecting the right products and techniques depends on your car’s paint condition and your goals. Here are some tips to help you choose:
Assess the paint condition: Look for scratches, swirl marks, oxidation, and other defects.
Select the appropriate polish: Compounds with different abrasiveness levels are available. Start with a less aggressive polish if unsure.
Choose the right tools: Dual-action polishers are beginner-friendly, while rotary polishers offer more power but require skill.
Use quality pads: Foam or microfiber pads come in various cutting and finishing grades.
Protect the paint: After correction, apply a high-quality sealant or wax to lock in the shine.
If you’re located in Scotland, you might want to explore professional services like paint correction fife for expert assistance.

How much does paint correction cost in the UK?
The cost of paint correction in the UK varies depending on several factors:
Size of the vehicle: Larger vehicles require more time and materials.
Extent of paint damage: Heavily scratched or oxidised paint needs more intensive correction.
Number of correction stages: Single-stage correction is cheaper than multi-stage.
Professional vs DIY: Professional services cost more but guarantee better results.
On average, a basic single-stage paint correction can cost between £100 and £250. Multi-stage corrections, which provide deeper restoration, can range from £300 to £700 or more. Luxury or large vehicles may incur higher prices.
DIY kits are available for £30 to £100 but require time and skill to avoid damaging the paint further.
When budgeting, consider the long-term benefits of professional correction, including paint protection and warranty on the work.
Step-by-Step Guide to DIY Paint Correction
If you decide to try paint correction yourself, follow these steps carefully:
Wash your car thoroughly: Use a pH-neutral shampoo and dry with a microfiber towel.
Clay bar treatment: Lubricate the surface and gently rub the clay bar to remove embedded contaminants.
Inspect the paint: Use a bright light to identify defects.
Choose the right polish and pad: Start with a medium-cut polish and a foam cutting pad.
Test on a small area: Check results before proceeding.
Polish the paint: Work in small sections, using a dual-action polisher at recommended speeds.
Wipe off residue: Use a clean microfiber cloth.
Apply finishing polish: Use a softer pad to refine the surface.
Seal the paint: Apply a paint sealant or wax to protect your work.
Tips for success:
Work in a shaded area to avoid product drying too quickly.
Keep the polisher moving to prevent heat buildup.
Use quality microfiber towels to avoid new scratches.
Be patient and don’t rush the process.
Maintaining Your Car’s Finish After Correction
Once your car’s paint has been corrected, maintaining it is crucial to preserve the finish. Here are some practical tips:
Regular washing: Use the two-bucket method and gentle car shampoo.
Avoid automatic car washes: They can cause swirl marks and scratches.
Use microfiber towels: For drying and detailing.
Apply a quick detailer spray: To remove light dust and enhance shine between washes.
Reapply wax or sealant: Every 3-6 months depending on product recommendations.
Park in shaded areas: To reduce UV damage.
Address contaminants quickly: Bird droppings, tree sap, and bug splatter can damage paint if left too long.
By following these steps, your car will maintain its showroom finish for longer, saving you money on future corrections.
Restoring your car’s finish with car paint correction solutions is a rewarding way to keep your vehicle looking its best. Whether you choose professional help or a DIY approach, understanding the process and maintenance will ensure your car shines on the road for years to come.


Comments